Getting verified on Facebook can be a tricky process, but you want the blue checkmark, don’t you?
We know! Social media is filled with fake accounts and bots, and this can be harmful to your brand. In this article, we will share steps and tips on how to verify your Facebook Business Page, personal page or profile to present an authentic presence on the platform.
Table of Contents
Why verify your Facebook Page?
Getting verified on Facebook is a great way to establish brand credibility online. Both Large brands and local businesses can be verified on the platform.
The verified badge lets your audience know that you are authentic. It also helps your Facebook Page show up higher in search results. This makes it easier for potential customers to find your business.
How to get verified on Facebook
Step 1: Choose what kind of account you want to verify
You can choose to request verification for a Facebook Profile or a Facebook Page.
| 🔔 Tip: When you’re logged in and verify your Facebook account, the form will automatically display the Pages you can submit an application – To apply for profile verification, you only need the profile’s URL to get started. |
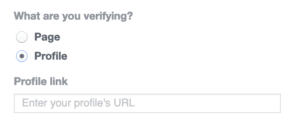
Source: Facebook
Step 2: Confirm your authenticity
When you apply for verification, you’ll be asked to provide a document that proves your identification. This step ensures that Facebook does not verify fake accounts and impersonators.
🔔 Tip: The accepted forms of identification are:
|
The rules about which specific forms of ID are acceptable vary depending on who issued them. View the complete list of rules regarding identification. You will need a digitized version of your proof of identity to attach to the form, e.g. a scan.
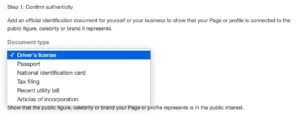
Source: Facebook
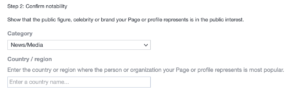
Step 3: Confirm your notability
On the Profile or Page verification application, you’ll be asked to prove your account is notable enough for the blue checkmark. In short, Facebook wants to know if your account is of public interest in verifying your account.
Source: Facebook
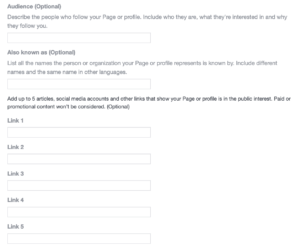
In this section, you’ll need to provide basic information, including the category your account falls under and the country or region where your account is most popular.
| 🔔 Tip: You will find several option fields, the more information you provide, the higher your chances are of getting verified. |
Source: Facebook
Step 4: Wait
Once you have submitted your application, Facebook will review your request and either approve or reject it. This process typically takes between 48 hours – 45 days.
In any case of your application, Facebook will email you regarding your application outcome.